How to add ProEmail Account into Gmail interface in Browser
To send using your Gmail interface / Adding your ProEmail account to Gmail.
Open your Gmail account in a browser.
Click on the Settings button in the top right corner and then click on “See all settings”.
- In the “Accounts and import” section, go to the “Send mail as” section and click on “Add another email address”.
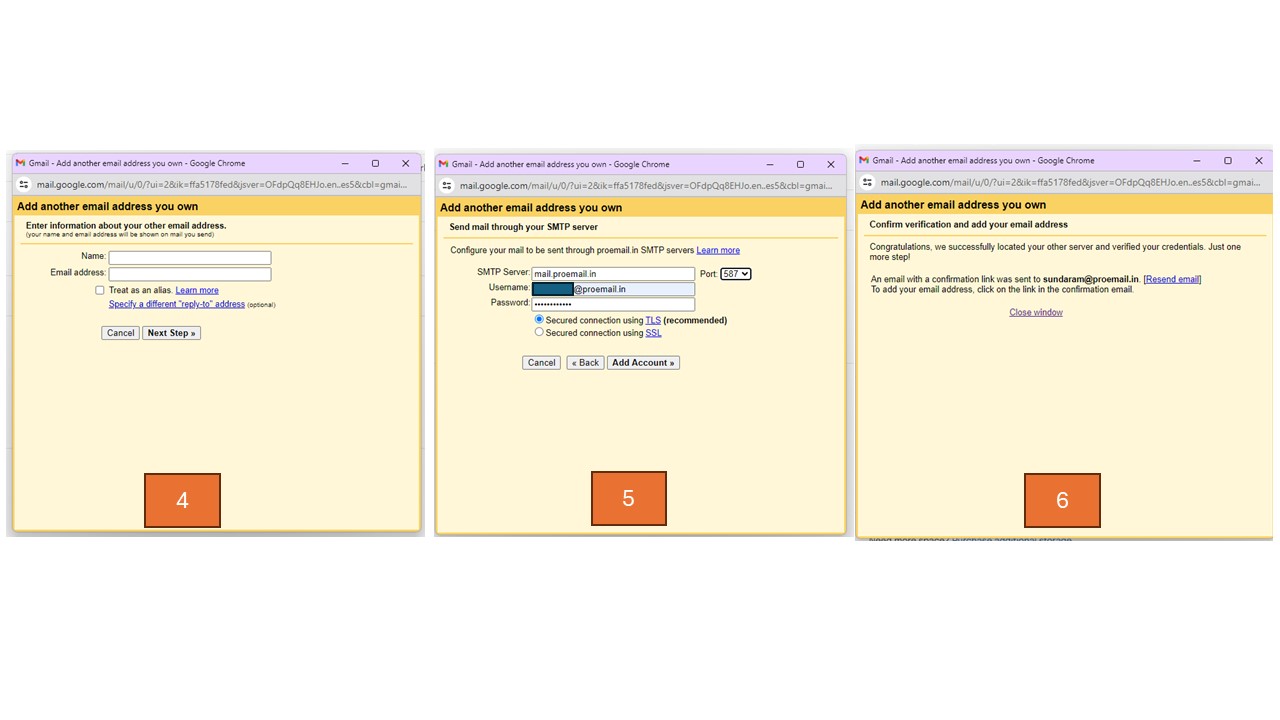
- Enter your name and ProEmail address. Unselect “Treat as an alias” and click Next.
- Enter (1) your ProEmail ID as the “Username”, (2) Password, and select Port as 587. Click on “Add Account”.
- You will receive a confirmation link in your ProEmail address; open it and click on the given link to confirm and complete the process.
To Check emails in your Gmail interface / Adding your ProEmail account to Gmail.
Open your Gmail account in a browser.
- Click on the Settings button in the top right corner and then click on “See all settings”.
- In the “Accounts and import” section, go to “Check mail from other accounts” and click on “Add a mail account”.
- Enter your ProEmail ID and click Next. In the next screen, simply click Next.
- Enter (1) your ProEmail ID as the “Username”, (2) Password, and select Port as 995.
- Don’t forget to select three options:
Leave a copy of retrieved message on the server (This is important; otherwise, you will not have copies on the server for future reference).
Always use a secure connection (SSL) when retrieving mail.
Label incoming messages as your ProEmail address. - Click on “Add Account” to complete the setup.
To use ProEmail address as the default sending mail address:
- Open your Gmail account in a browser.
- Click on the Settings button in the top right corner and then click on “See all settings”.
- In the “Accounts and import” section, go to the “Send mail as” section and set your ProEmail address as the default.


